Choosing Your Build Purpose
Before you even browse a parts list or open a single review tab, start with one question: what’s this PC for? A rig built to crush AAA titles at 4K is going to look very different from one meant for editing 8K video, streaming with overlays, or just managing spreadsheets and Zoom calls.
Defining your core use case upfront sets the tone for everything CPU choice, GPU priority, RAM needs, even airflow. Gamers chasing smooth frames need strong single core performance and a capable GPU. Content creators lean more on multi core CPUs with fast storage and high RAM capacity. Streamers need a balance of both and perhaps a second screen or capture card. Office or daily productivity? Stick with power efficient components and save a chunk of your budget.
Which brings us to tradeoffs. More performance means more power, more heat, and usually more cost. Budget builds aren’t dead in 2026, but being realistic about what you need and what you don’t will keep you from overspending or future proofing into oblivion. Be honest with yourself. The perfect build isn’t the most expensive one it’s the one that actually fits your workflow and wallet.
Picking the Right Parts
Building your custom PC starts with smart component selection. Each part must not only meet your performance needs but also fit together seamlessly. Here’s what to consider:
CPU & GPU Combos: Tailored to Your Workload
Your processor and graphics card define your PC’s core performance, so tailor them to your specific use:
Gaming: Prioritize a high clock speed CPU (like AMD’s Ryzen 8000 series or Intel’s 14th gen chips) paired with a powerful GPU such as NVIDIA’s RTX 5000 series or AMD’s RDNA 4 cards.
Content Creation: Opt for CPUs with more cores (12+ is ideal) and GPUs equipped with high VRAM to handle rendering and high resolution editing.
Streaming: Balance both CPU and GPU the CPU handles encoding while the GPU handles gameplay.
Daily Productivity: Integrated GPUs and mid tier CPUs deliver solid performance while keeping costs low.
Tip: Always check for bottlenecks. A powerful GPU in a system with a weak CPU will underperform.
Motherboard Compatibility: The Foundation of Stability
Choosing the right motherboard ensures everything runs smoothly:
Socket & Chipset: Match your CPU socket (e.g., AM5 or LGA 1700) and pick a chipset that supports your needs some enable features like overclocking and expanded I/O.
Form Factor: ATX, micro ATX, or mini ITX pick based on your case size and expansion needs.
Connectivity Options: Look for Wi Fi 7 support, multiple M.2 slots, USB 4.0, and Bluetooth 5.3.
2026 Insight: AI enhanced BIOS configurations and built in machine learning features are entering mainstream motherboards.
Memory, Storage, and Power
Each of these components impacts speed, capacity, and stability:
RAM:
Minimum: 16 GB still works, but 32 GB DDR5 is recommended for most modern use cases.
Speed: DDR5 is now the new standard. Look for speeds of at least 6000MHz for optimal performance.
Storage:
SSD over HDD: NVMe SSDs now dominate, with Gen 5 drives offering speeds above 14,000 MB/s.
HDDs: Still useful for mass storage but not ideal as a boot drive.
Power Supply Unit (PSU):
Wattage: Depends on your GPU/CPU combo; gaming rigs usually need at least 750W.
Efficiency Rating: Look for 80+ Gold or better for energy savings and stability.
Modular Design: Modular or semi modular PSUs make cable management much easier.
2026 Hardware Trends to Watch
Stay ahead of the curve with these emerging technologies:
DDR5 Becoming Standard: Lower latency and higher speeds now widely supported.
PCIe 5.0 Connections: Delivers faster bandwidth for GPUs and next gen NVMe SSDs.
AI Accelerated GPUs: Cards like NVIDIA’s RTX AI series or AMD’s FSR powered GPUs bring native AI enhanced rendering, boosting real time graphics and workflow acceleration.
Pro tip: Use online part pickers or compatibility checkers before purchasing they’ll flag potential conflicts and help you stay within budget.
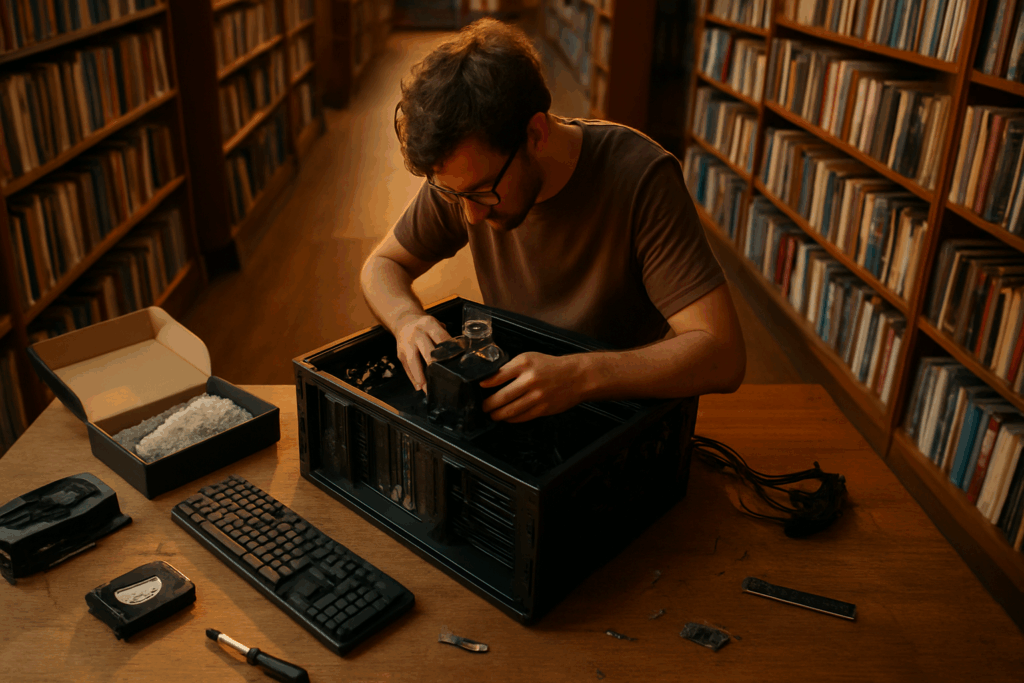
Tools You’ll Need
Let’s not get fancy just get the essentials. First up: the anti static wrist strap. Yes, it still matters. You don’t want a rogue spark taking out your $400 GPU. Clip it to your case, strap it on, and keep your components safe while you work.
Next, grab a solid screwdriver set. Magnetic tips help, especially in tight spots or when you inevitably drop a screw into the case. Thermal paste is also key. Some coolers come with it pre applied, but if not, have a tube on hand. You only need a pea sized drop, so one tube will last years. Cable ties are your silent allies keep wiring clean and airflow unrestricted. Your future self (and your temps) will thank you.
Before you touch a part, launch a PC planning tool. Options like PCPartPicker or Build Redux’s planner make it easier to map out component compatibility and visualize the full build. It’s simple, free, and saves you from rookie mistakes like buying a motherboard that won’t fit your case.
These tools don’t just make the process smoother they eliminate guesswork. Which is the whole point.
Assembling the Hardware (The Main Event)
Start with the case. It’s your build’s chassis everything depends on how you set it up. Focus on airflow first: front to back or bottom to top is standard. Clear paths for fans are more important than RGB flash. Route cables early, especially behind the motherboard tray if your case allows. Good cable routing now saves you headaches later.
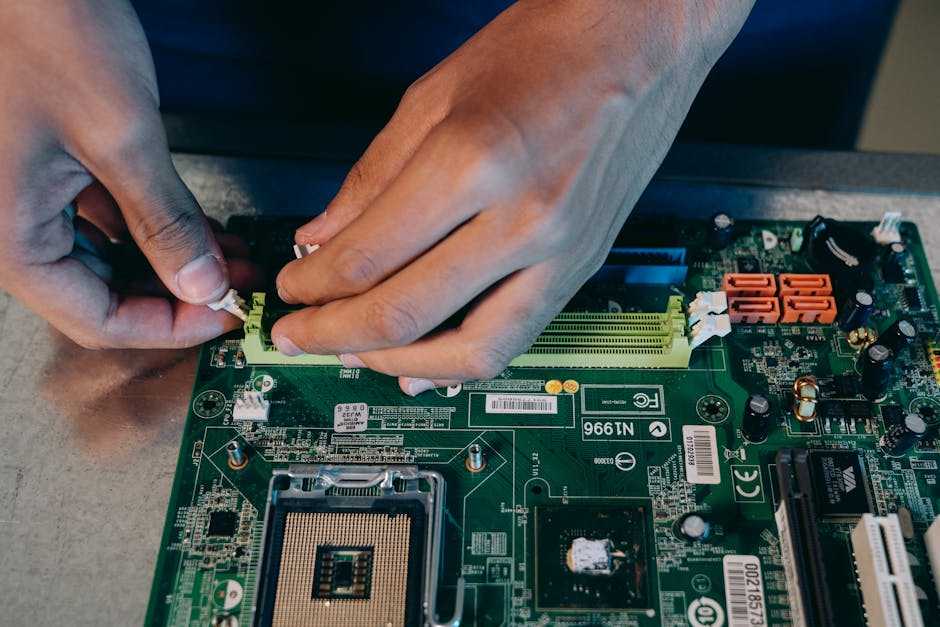
Next, prep the motherboard. Drop in the CPU carefully lift the socket lever, align the triangles, no force required. Apply a pea sized dab of thermal paste if your cooler doesn’t come with any pre applied. Install RAM sticks and M.2 SSDs early while the board’s outside the case. It’s just easier.
Now, mount the board inside the case. Align it with standoffs, don’t overtighten the screws. Then slide in your GPU it’ll click into the PCIe slot and screw into the case for stability. Mount the power supply based on your case layout. Modular PSUs make clean builds simpler.
Wiring is where builds get messy or professional. Connect the 24 pin ATX and 8 pin CPU power cables first. Then the GPU. Cable ties make a difference use them generously to avoid airflow choke points.
Time for the first boot. Don’t close the case yet. Plug in a monitor, keyboard, and turn it on. You should hear one clean beep (if your board has a speaker) and see a POST screen. No fans spinning? Re check power cables. No display? Reseat the GPU and RAM.
For more visuals and safety tips, head to this custom PC tutorial. It’s a solid walkthrough for beginners and pros alike.
BIOS Setup & OS Installation
Once the hardware’s locked in, it’s time to get under the hood. BIOS (or UEFI, depending on your board) is where you dial in the system’s brain. First, enable XMP (or DOCP for AMD users). It tells your RAM to run at its rated speed instead of defaulting to something slower. One quick toggle goes a long way.
Second, set your boot order usually prioritizing your USB drive or external installer for the OS. Once Windows or your preferred OS is installed, you can change it back to boot primarily from the SSD.
Next, fine tune your fan curves. Most modern boards let you do this per fan header. The goal is airflow that keeps temps in check without sounding like a jet engine. Smart fan profiles strike a balance between cooling and noise.
Don’t skip Secure Boot and firmware updates. Secure Boot adds a layer of OS protection against boot time malware. Firmware updates applied directly through the BIOS or via a USB drive can improve system stability, performance, and compatibility.
Once that’s done, it’s go time. Fire up your installer, do a clean install (don’t reuse old partitions), and let your new system breathe fresh digital air on its own terms. Clean installs wipe bloat and random errors right off the map. It’s worth the extra few minutes.
Final Setup: Drivers and Benchmarks
Once your PC powers on and BIOS confirms your hardware is recognized, it’s time to load the essentials: drivers. Head straight to the official websites NVIDIA, AMD, or Intel for the latest GPU drivers. Same goes for your motherboard’s chipset; grab those from the board manufacturer’s support page. Skip third party driver sites they’re often outdated or worse.
With your drivers sorted, stress testing comes next. This isn’t just about flexing numbers it’s about stability. Tools like Cinebench, FurMark, and 3DMark will push your CPU and GPU hard. For temps, HWMonitor and Core Temp are solid picks. You’re looking for consistency here if your PC crashes or throttles, something’s off.
And hey, sometimes things break. No display? Check cable seating, especially on the GPU. Boot loop? Reseat the RAM or clear the CMOS. System freezing under load? Double check thermals and power supply wattage.
This phase isn’t glamorous, but it’s crucial. A rig that looks great but crashes under pressure isn’t worth much. Take the time to test it right, fix the bugs, and then game on.
Want a deeper walkthrough? Dive into this custom PC tutorial to fine tune every step with expert detail.
Keeping It Running Smooth
Building a custom PC is one thing. Keeping it running like a well oiled, whisper quiet beast is another. This isn’t glamorous work, but it’s what keeps your rig alive past year one.
Start with the basics: dust. Your fans pull in air and along with it, dust that clogs cooling paths and pushes temps up. High temps mean throttled performance. Once a month, power your system down and hit it with compressed air. Pay attention to heatsinks, fan blades, and intake filters.
Next up: mastering thermals and noise. Don’t settle for the stock coolers if your CPU is putting in serious work. Aftermarket air or liquid coolers can make a big difference both in temperature and sound. Use software to create custom fan curves: keep things quiet under light loads, then ramp up only when needed.
Want to delay your next upgrade? Choose modular components and think about airflow early you’ll thank yourself when swapping a GPU or adding RAM doesn’t mean tearing your build apart.
Now the software side. Create regular backups. Whether you’re editing high res video or running intensive games, always have a copy of your OS image and critical files off your main drive. Set alerts for BIOS and driver updates Intel, AMD, and NVIDIA push performance and stability improvements more often than people realize.
Finally, track your performance over time. Use reliable tools to benchmark your system every few months. If scores drop or thermals spike, you’ll catch performance dips before they affect your workflow or frame rates.
Treat your PC like a living system. Tune it, clean it, back it up. It’ll run strong longer and stay battle ready for work or play.